
In my humble opinion, it is very important to know the ‘why’s, when’s, and how’s’ when it comes to cleaning your pet’s ears.
Knowing this can help prevent or lessen painful ear issues, which makes life better for all.
Ear infections are among the top ten (often the top three) reasons pets are brought in to see veterinarians.
I want to help you avoid these visits as much as possible.
Skip to section:
Why Clean Your Pet’s Ears?
Number 1: The most significant ‘why’ is that ear infections are painful and cause pets (and their owners) a lot of distress. By following basic ‘rules’ of when and how to clean your pet’s ears, ear infections can become non-existent or at least a lot less frequent.
Healthy ears are "self-cleaning." However, if the ear canal is compromised or damaged, then infections can occur.
Damage is caused by improper cleaning, a change in the "environment," like changes in the pH, moisture level, or humidity of the ear canal, or an underlying medical issue like food allergies or polyps that can affect the ear.
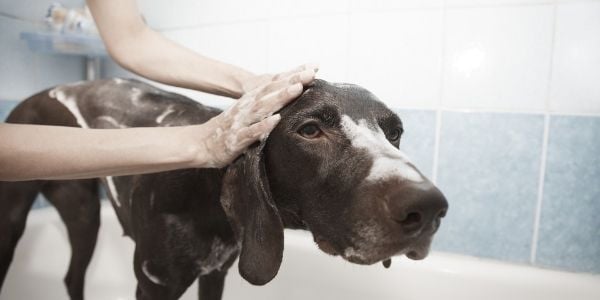
Number 2: The purpose of cleaning your pet’s ears after a bath (whether done at home or by a groomer) or swimming is to remove the excess water from the ear canal. When moisture is present in the canal, it creates a damp and humid environment, encouraging yeast and bacteria growth. An overgrowth of one or both can result in an ear infection.
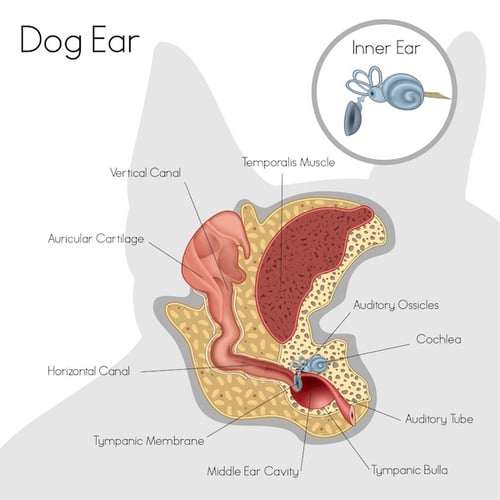
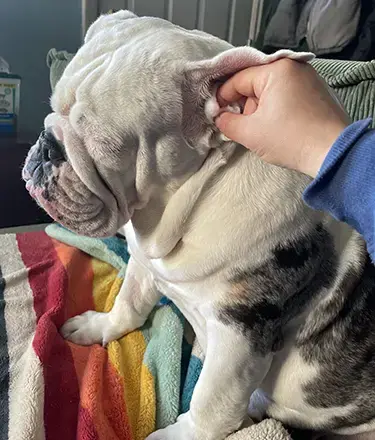
The shape of a pet's ear canal is what makes them vulnerable to infections. It's narrow and L-shaped, trapping the moisture inside. The photo below is of a dog's ear, but the same shape is true for cats; however, cats' ears are not as angled.
Number 3: Routinely cleaning your pet’s ears when they suffer from chronic ear infections is beneficial in decreasing the frequency of infections as well as their severity. You are actively removing trapped debris, which can lead to infections that can only be removed with cleaning.
You are also improving your pet's ear health by helping to maintain an environment less favorable to the growth of yeast and bacteria.
A Step-By-Step Guide to Cleaning Your Pet’s Ears
While it is always in your and your pet’s best interest to have red, itchy, foul-smelling ears evaluated by your veterinarian (see note below), at some point, cleaning those ears will likely be part of the treatment plan.
And since we vets don’t always do the best job explaining or demonstrating the proper way to clean your pet’s ears, I’ve put together this step-by-step guide to help.
Note: Not all ear problems are caused by a bacterial or yeast infection (in other words, poor ear cleaning) – and even those often have an underlying problem.
Some common underlying or predisposing problems include environmental allergies, food hypersensitivity, an ear tumor or polyp, a stuck grass seed ("foxtail") or other foreign body, a mite infestation, and a host of other possibilities.
While ear hair plucking may be needed to allow for better cleaning and airflow, if not done properly, it can result in an ear infection.
Ear-Cleaning Supplies You’ll Need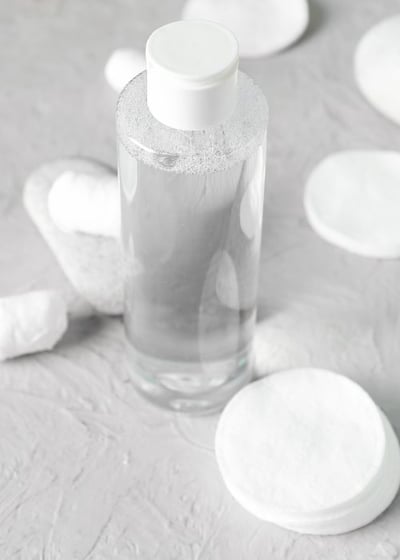
A safe and effective ear cleaners
Be aware that not all cleaners are created equal. Some are better than others at treating yeast infections, while others are better at treating bacteria. Some help dry the ears, while others don't.
Some cleaners that dry do so because they contain rubbing alcohol or witch hazel, both of which can be downright painful and irritating to your pet’s already inflamed ears.
Here are a few ear cleaners that include a drying agent and are good for regular maintenance cleanings. You can easily pick them up online, at a pet store, or at your vet's office.
Always check with your veterinarian to ensure that you are using a safe and appropriate ear cleaner, especially if your pet suffers from ear issues.
These cleaners have no alcohol or a low concentration, which is often counteracted with aloe in the ingredient list. So, all of these are non-irritating. Please never use regular alcohol to clean your pet's ears.
Virbac Epi-Otic Ear Cleaner for Dogs and Cats – no alcohol
VetWELL Ear Cleaner for Dogs and Cats – benzyl alcohol (used in many cosmetics), but at this low dose, it is considered safe and non-irritating
Dechra Epiklean Ear Cleanser for Dogs and Cats – no alcohol
Otiderm Advanced Formula for Dogs and Cats – benzyl alcohol, but at its low dose, it is considered safe
Vetoquinol Ear Cleansing Solution for Dogs and Cats – the first ingredient is SD alcohol, but 'SD alcohol 40' is a type of denatured alcohol used in cosmetics and skincare products. Like benzyl alcohol, it's a safe form of alcohol.
Something absorbent
You'll need something soft and absorbent to remove the dislodged debris and excess ear cleaner.
Cotton balls, cotton make-up removal rounds, gauze squares, or paper towels typically work well.
Note: You are only using these to remove the excess debris that comes out of the ear canal and lands on the surrounding area. You are not to use these within the ear canal to rub or wipe out debris, as this can cause micro-abrasions within the canal, leading to the worsening of the infection.
Do NOT use Q-tips®, as they introduce a risk of you damaging your pet’s eardrum (“tympanic membrane”) and causing micro-abrasions that can lead to infections.
Additionally, they can push debris deeper into the canal and make it more difficult to remove. Only a veterinary professional is trained to use these properly.
Non-slip mat
A large towel or mat. These serve not only to help keep the mess under control but also help as a non-slip surface for your pet to sit on.
Some people feel that they should restrain their pets using a towel. Some pets may feel more anxious with a towel wrap.
Our behavior experts feel that this should only be used for situations where the pet can't be desensitized (extreme fear, urgent medical issues that won't allow time for desensitization).
You should ask for guidance from a behavior or medical expert before using restraint. When you remove choice and control from a cat or dog, their guard goes up. It can make the cleaning process much harder.
Ideally, desensitizing your pet to ear cleaning will make using restraint unnecessary.
See the steps on how to desensitize your pet to ear cleanings below.
See when it may be appropriate to use a towel for restraint.
Treats and an assistant
Cat and dog ear cleanings can be a two-person job — especially with pets that aren’t used to the procedure and in those with particularly inflamed and painful ears.
The treats, of course, are for rewarding your pet throughout and following the cleaning so as to make it as positive an experience as it can be for them — this may even save you from having to use an assistant for future cleanings!
If it's just you doing the ear cleaning, then set up a lick mat for your dog or cat. Smear some dog-safe peanut butter or your cat's favorite Churu spreadable treat to keep them distracted while you clean their ears.
Pick an appropriate cleaning spot
Choose a room or outdoor environment that can get dirty. No matter how much of the excess cleaner you try to get out, your pet will shake their head and get ear gunk and cleaner on your walls and your clothes. It comes with the territory, so be prepared.
Muzzle
If your pet is feeling a lot of pain, it may be wise to muzzle them to protect yourself from being bitten. You should have your pet evaluated by a veterinarian first, though, as there are times when cleaning your pet's ear is not appropriate.
How to Clean Ears After a Bath, Swimming, or as Routine Maintenance
This type of cleaning isn’t as involved as when an ear infection is present (those instructions are below).
Simply use an ear cleaner with a cleaning and drying agent, such as Otiderm®, overfill the ear canal with the cleaner and massage. Wipe away the extra cleaning solution, and BOOM! You are done!
It is always recommended to have your veterinarian evaluate your pet’s ears any time they are red, painful, and smelly. Ideally, do this before you start any at-home treatments.
Without doing so, not only might the treatment you provide fail to fix the problem, but it could also actually make matters worse — prolonging your pet’s discomfort and costing you more money in the long run. Read more about when NOT to clean your dog or cat's ears.
How to Clean Your Pet's Ears When They Have an Ear Infection
If your pet's ears are painful to the touch, smell, or are red, it's best to have your veterinarian examine your pet and provide guidance on what cleaner to use and if medication is also needed.
They will likely give your pet's ear(s) a good cleaning if there's an infection, and then you will provide the ongoing maintenance at home.
Since your pet is in discomfort, go through these steps gently and slowly.
- Wrap your pet in a towel to help keep them dry and calm them. This also helps prevent you from getting scratched with their front paws. You may want to lay a second towel under them to help collect any debris and excess cleaner.
- Hold your pet’s ear flap up to open it. Pulling it "up" helps stretch out the "L" shape of their ear canal and allows the cleaner to go deeper into the ear.
- Shake the ear cleaner bottle well before use. Then, gently place the tip of the bottle over the opening of your pet’s ear canal, but do not touch the ear if possible. If the tip touches tender skin, it may hurt, and if your pet jumps and the tip is on the ear, it may jab the ear.
(Be kind to your pet as the solution can be cold – make sure it's room temperature or, better still, gently warm the cleaner slightly by putting the bottle under warm running water for a few minutes). - Gently squeeze a lot of the cleaner into your pet’s ear until the liquid runs – actually flows – out of the ear canal opening. You need an adequate amount of cleaner to get deep into the canal to clean it properly.
- Keeping the ear flap held up, vigorously massage the base of your pet’s ear (do this for a good 10–15 seconds).
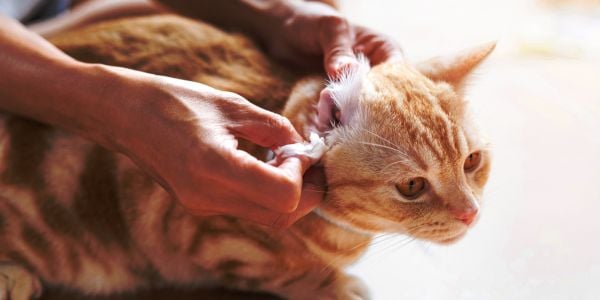
Alternate method: If your pet's ears are too infected, or if they really don't like having the cleaner squirted directly into their ears, you can heavily soak a cotton ball with the cleaner, place it onto the top of the ear canal, and then massage it to release the cleaner.
This isn’t the most ideal way to clean ears because it is hard to get enough cleaner deep into the canal for flushing.
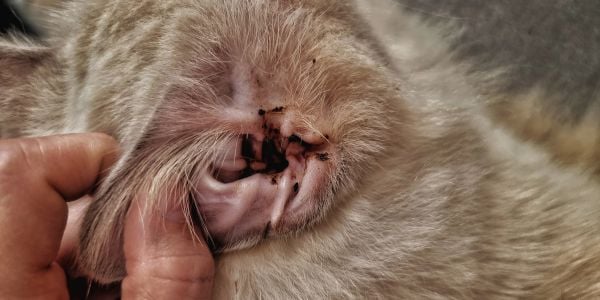
- Keeping the ear flap held up, grab whatever soft, absorbent material you're using and wipe up as much of the liquid and ear debris as you can. "Ear debris" is the brownish gunk that you'll notice on the cotton ball. In some cases, it can be a yellowish discharge. A healthy, clean ear won't have this dark brown or yellowish stuff coming out of it.
- Repeat the flushing and wiping step above as many times as necessary to remove the bulk of the ear debris. Generally, you will need to clean the ears every other day (depending on the type of medication given).
- Stand back – your pet will want to shake their head.
- Move on to the next ear and repeat the same process.
- The towel can now be used to dry your pet and yourself off!
- Reward your pet with some yummy treats! You will likely want a yummy treat after this whole process, too!
Making the activity of cleaning your pet's ears enjoyable is an excellent goal to have. Because once their ear infection is cleared up, you'll want to do regular ear maintenance – cleaning once a week if possible.

When Should You Clean Your Pet’s Ears?
You should ALWAYS clean your pet’s ears after a bath or swimming and when they return from the groomers.
If you have a pet that suffers with chronic ear infections, you should clean their ears once weekly to every other week.
You should clean your pet’s ears as directed by your veterinarian when they have an ear infection. Some ear medications work more efficiently when the excess debris is removed, and others perform better when the ears are not cleaned during the treatment process.
When You Should Start Handling and Cleaning Your Pet's Ears
Getting your pet used to having their ears handled and cleaned is something that should be started as early as possible so that the process is a positive one for both of you.
Ideally, starting to condition your pet to have their ears handled and cleaned is best when they are young but fear not; with time and patience, you can desensitize them at any age – and we are here to help you with that!
How to Desensitize Your Dog or Cat to Ear Handling and Cleaning
When introducing your dog or cat to ear handling and cleaning, start slow!
Find a quiet area in your home where you and your pet are comfortable. This will help them feel more at ease during the process. Have all necessary supplies nearby so you can create positive associations, but you won't be using them in the beginning.
Find a starting point where your pet is comfortable with the level of handling, and gradually, over a few short sessions, increase the intensity of the handling until they’re ready for the complete ear-cleaning process. You’ll pair each step forward with a reward so your pet forms positive associations with the process.
And if they show any signs of discomfort or stress, you’ll turn the intensity down and move forward a bit more slowly. Don’t push them past their comfort zone.
Do these short training sessions when your pet is relaxed. Consistency and patience are key when introducing and desensitizing a dog or cat to ear cleaning. Make it a regular part of your grooming routine, and approach each session with a calm and positive attitude.
Desensitization could take 5 to 10 sessions, possibly a few more, depending on your pet's comfort level.
Step 1: Begin by gently touching and rubbing their ears in a comforting manner. If that’s too much for your pet, start by simply touching the ear with the tip of your finger for a second and gradually work up to more intense touching, then rubbing.
Start with short sessions, gradually increasing the duration as your dog or cat becomes more comfortable. And reward throughout.
Step 2: When they’re ready, add in gently lifting their ear flap if your pet’s ears are floppy and gently massaging the base of their ears. Give treats regularly throughout this practice.
If at any point they get scared, stressed, or try to pull away, stop what you're doing and end the session with some praise and play. In the next session, go back a couple of steps to a place where they’re comfortable again and move forward a bit more slowly.
Step 3: Once they are comfortable with your handling their ears in this manner, then introduce the tools or products you’ll be using. It’s the same process of starting where they’re comfortable and slowly increasing the intensity.
Maybe that means touching a clean cotton ball to the outer ear, then gradually working to the ear canal side, increasing the length of the touching.
Step 4: Let your pet sniff and inspect the bottle and give them a treat. Then, squeeze some ear-cleaning solution onto the cotton ball and let them sniff it. Give them a treat! This will help familiarize them with the scent and make them anticipate a good thing (treat) whenever they see the bottle and smell the solution.
Continue baby steps with the bottle closed. Touch the outer ear a few times, then the inner ear flap close to the ear canal opening, but don't go too deep, rewarding each step in the right direction and backing off when it’s too intense.
Step 5: Now, you can start squeezing the cleaner into the ear canal. If you warm the bottle under hot water, then the cold cleaner won't be as startling. Ideally, start with just a drop or two of cleaner and gradually work up to filling the ear canal as directed above.
Over time, gradually increase the duration of the ear cleaning practice sessions before doing the entire process with the actual and more thorough ear cleaning.
For Dogs and Cats with Extreme Fear of Handling
If ear cleaning isn’t a medical emergency, it’s important to work with your pet to reduce fear and get them comfortable with basic touching and handling before working specifically on ear cleaning.
You want them to feel safe and secure. So comfort with your presence and general touching should come first.
If it is an urgent situation where ear cleaning can’t wait, there are a few things you can consider to reduce the stress on your pet.
- Ask your veterinarian if they can prescribe a mild sedative that you can give before ear cleaning to help relax your pet.
- Wrap them in a towel. If they’re already in an anxious state, wrapping them in a towel can calm them a bit. It also protects you from scratches. It will also help the process go more smoothly and quickly so you can let them go as soon as possible. This video shows how to wrap a cat in a towel:
- Have all your supplies ready so you don’t waste a moment.
- Try to make it positive, with treats before and after.
- Watch your body language. If you approach your pet like you’re trying to corner a tiger, they’re going to know something scary is happening, and instinct will kick in.
- On the other hand, if you’re relaxed and interacting with them in a normal way, then you gently pick them up or wrap them in the towel; they won’t be on high alert before you even start. And keep your cool during the cleaning as well.