 We all know accidents happen. Most pet owners have to deal with a pet wound at one time or another.
Sometimes they are minor, like a torn toenail, and other times they are more severe, such as a deep laceration. And for some, this can be a panic-inducing ordeal. It doesn’t need to be!
It is critical that any wound that penetrates the body wall (a break in the muscle protecting the internal organs), is large and traumatic, profusely bleeding, or involves exposed bone, needs to be seen by a veterinarian immediately.
Wounds to the eye should also be seen by a veterinarian ASAP. Do your best not to stress or panic because your pet will sense it. This will raise their stress level, increase their circulation and cause more bleeding. Try to gently cover the area and apply light pressure.
Be very careful. Remember, they are likely in pain and may bite or scratch when you are attempting to help them.
If there is a penetrating foreign object in your pet's wound, such as a stick or glass, do not attempt to remove it. Do your best to protect the area and not let the object move or penetrate deeper into the wound. Seek immediate medical attention for your pet.
Beyond the more severe wound types explained above that require immediate medical attention, it is important that ALL wounds be evaluated and treated properly, even if they don’t seem severe.
For example, a bite wound that may only have a small puncture, may not look that bad but can introduce bacteria from the biter’s mouth into your pet’s deep tissue. This can cause a severe infection.
It is always best to err on the side of caution and to consult with your veterinarian for any pet wound.
How to Clean Pet Wounds
What to Do After Cleaning Your Pet's Wound
How to Know if Your Pet's Wound is Healing
We all want wounds to heal as quickly as possible. This can only happen if prompt and appropriate treatment is administered.
Healing can be hindered by not properly flushing and decontaminating wounds, using the wrong products to clean and treat wounds (such as hydrogen peroxide), and by not having the appropriate closure or protection of the wound.
Veterinarians see a lot of wounds. The most common wounds seen by veterinarians include:
- Dog bites
- Cat bite abscesses
- Foreign body abscesses
- Eye wounds
- Torn nails
- Puncture wounds
- Lacerations
- Torn ear flap
- Cut paw pads
- Torn lip or injured gums
- Hematoma
- Ruptured anal glands
Just as varied as the wound types is the way to treat them. Often the process of wound treatment begins at home when pet owners first discover that their pet has been injured.
Let’s look at what you can do at home to clean wounds and provide essential protection before contacting your veterinarian for follow-up wound care.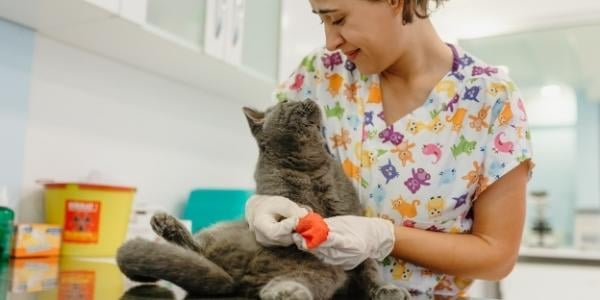
How to Clean Your Pet's Cut or Wound
Use a Muzzle to Prevent Getting Bitten While Treating Your Pet's Wound
First, it is critical that you can gently and safely restrain your pet while treating their wound. Remember, your pet is in pain and likely nervous from the trauma that caused the wound and is, therefore, more likely to bite.
If for any reason your pet happens to bite you while you are treating their wound, please seek medical care for yourself as soon as possible. DO NOT DELAY. Animal bites can lead to bad infections and even blood poisoning in humans. If your cat bites you, read how to clean your bite wound properly in "What to Do if You're Bitten by a Cat."
Muzzle for dogs: Placing a basket-type muzzle, like the Baskerville muzzle, is often the easiest to apply and least distressful for a dog in pain, as they let the dog pant normally. But basket muzzles aren't practical for every dog or every situation, so a cloth muzzle (like this adjustable set) might be best for your dog.
Muzzle for cats: A nylon cat muzzle is the easiest to apply and least stressful for a cat in pain.
Once you have a muzzle in place, it is sometimes helpful (depending on the location of the wound) to wrap your pet in a towel. It’s ideal to have someone assist you in the process, if possible.
Don't have a muzzle and need to protect yourself while cleaning your dog's wound? You can make an emergency muzzle using your dog's leash, as shown in this video:
Cleaning and Bandaging Your Pet’s Wound at Home
STEP 1 – Prepare the Wound
Stop the Bleeding
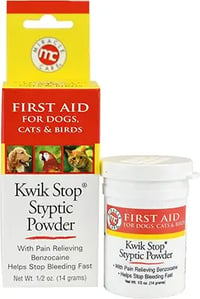
If a wound is bleeding, you'll need to stop the bleeding before proceeding with cleaning the wound. Stopping bleeding is easy if you have a bottle of styptic powder around — this stuff is magic and works wonders on stopping bleeding in pet wounds, even heavy bleeding!
But what if you don't have a bottle of blood stopping powder available? Attempt to stop the bleeding by applying direct pressure to the site and get to the vet immediately if a few minutes of direct pressure doesn't stop the bleeding.
PRO TIP: If the wound is something minor, such as cutting your pet’s nail too short or your pet rips a nail (either completely or partially), you can apply cornstarch to the area and lightly cover it. If a nail has been torn off, I would recommend having your veterinarian evaluate the area.
Remove the Fur Around the Wound
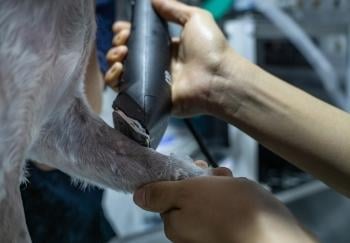 If possible and easy to do, it's helpful to remove the fur from around your pet's wounds before cleaning them. This is because the fur around a wound is likely to (1) become soiled and matted with blood and debris, making it more difficult to keep the area clean, and (2) get stuck in your pet's wound, preventing it from healing fully and acting as a source of infection.
While I don’t recommend using hydrogen peroxide for cleaning your pet’s wound, it can be helpful during this step.
If you find your pet and the blood has already dried in the fur around the wound site or anywhere on the fur, this is a time to use hydrogen peroxide. The peroxide will loosen the dried blood allowing it to be removed easier by either combing it out or wiping it off.
I have done this many times. To comb the blood out of the fur I have used either a flea comb or a metal narrow-toothed grooming comb. This will then make clipping the fur faster and easier since the clotted blood won’t clog the clippers.
To avoid cutting your pet's skin even further, don't use scissors (and don't use a razor) for this step. Instead, use hair or beard clippers (either electric or battery-powered — like this one) to remove the fur from around your pet's wounds. It's far safer, and also more effective.
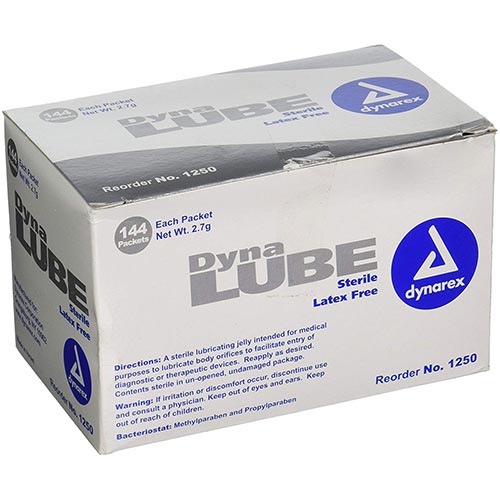
PRO TIP: For superficial skin wounds that aren't too deep (where they aren't entering the body cavity or you see major blood vessels), put a bit of sterile, water-soluble lube in the wound before clipping the fur.
These small, single-use lube packets are perfect to keep in your pet first-aid kit. This will help to prevent the clipped fur from sticking in the wound, and then both the lube and the clipped fur will wash out when you do the wound flush in the next step.
STEP 2 – Flush the Wound
Use Saline to Flush the Wound
Flushing is essentially the removal of debris from the wound site with a steady flow of solution. Additionally, you are hydrating the wound and you are making it possible to better visualize what the wound looks like after the debris and excess blood is removed.
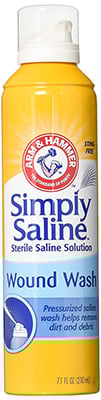
Saline matches the pH of the skin and it doesn’t burn or irritate an open wound. This is ideal because your pet is less likely to resist what you are doing. Having a bottle (or two) of a sterile, pressurized saline "wound wash" in your pet's first-aid kit is a great idea.
It's a quick, easy, and effective way to do a thorough initial cleaning of your pet's wounds because the pressurized saline easily generates the pressure necessary to remove debris and also dislodge bacteria from the damaged tissues.
Since they can also be used to clean your own wounds and are less expensive when bought in bulk, I recommend having more than one bottle lying around — here's a good wound flush option.
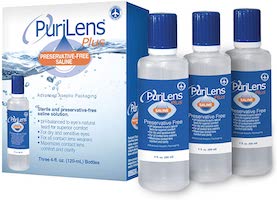
If you don't have a sterile, pressurized saline wound wash, a good substitute would be a bottle of saline eye wash, like this one.
Avoid using soaps (unless specifically instructed to do so by your veterinarian – they may give you a special surgical soap), shampoos, rubbing alcohol, herbal preparations, etc. These can be potentially irritating, hinder healing, and be potentially toxic if your pet licks or chews at the wound. Also, soaps and shampoos will require extra rinsing and handling of an already painful area.
One instance where you may need a mild soap, such as Dawn®, is if your pet has grease or oil in the areas surrounding the wound. I have seen pets have wounds from getting under cars or in the engines and they are covered in grease or oil.
In this case, cover the wound with sterile water-soluble lube (single-use lube packets are perfect for pet first-aid kits) and lightly cover it with gauze and vet wrap. This will protect the wound and prevent the soap from irritating the area. As soon as the cleaning and rinsing are complete, remove the wrap and use the saline to rinse the wound free of lube.
STEP 3 – Disinfect the Wound
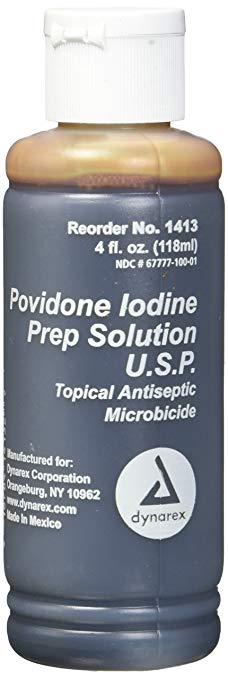
There are two great and readily available antiseptics for disinfecting pet wounds — Chlorhexidine diacetate* and Povidone iodine**. I recommend you have a bottle of one (or both) around your home with pets.
You don't want to use either of these at "full strength" though, they both need to be diluted for safest use.
Chlorhexidine diacetate should be diluted to a 0.05% solution, while the povidone-iodine should be diluted to a 1% solution for safe and effective cleaning and disinfecting.
Not sure how to do dilutions? Here's an easy-to-use dilution calculator to help you get it right. And, for safety’s sake when diluting, always add the chlorhexidine or iodine to the water, and not the other way around. Just in case of splashback, which can injure your eyes!

You can either use some soaked gauze sponges to gently blot the wound area or if you've got a syringe in your pet's first-aid kit, you can also use that to spray the diluted disinfecting solution onto the area under a bit of pressure (which can further help to dislodge any bacteria or debris that was missed in the previous "wound flushing" step).
*Caution about Chlorhexidine: Chlorhexidine is available as both a "scrub" and a "solution," when using it as an antiseptic for your pet's wounds you want to be sure to use the "solution," NOT the scrub.
**Caution about Povidone iodine: Dilute to a 1% solution. Also, note that some people can be allergic to Povidone iodine.
So, there you have it, how to correctly clean and disinfect pet wounds. But just remember, first aid is often just that — first aid. If your pet has suffered a bite wound, deep puncture, bad cut, or a nasty abscess, after administering first aid and cleaning the wound, you need to take them to a veterinarian.
These types of injuries typically also require “second” aid — veterinary care! It is important to protect the area you have just painstakingly cleaned while transporting your pet to the veterinarian.
 What to do AFTER you have cleaned and disinfected your pet's wound
You have just completed a wonderful job of cleaning and disinfecting your pet’s wound. But now you must protect it while you transport your pet to your veterinarian. How this will be done depends on how quickly you will be going to your veterinarian. With that said, ideally, you should go immediately, but we all know in life this isn’t always possible.
If you are able to go immediately, you can likely just soak some gauze pads in the saline, place it over the wound and then lightly cover the area with an ace-bandage or vet-wrap (do not make it too tight). But if it will be a few hours, for example, if you are out hiking, you will want to cover it differently.
For superficial wounds (near to the surface of the skin and muscle)
I recommend, once the surrounding area of the wound is dry, apply a layer of sugar to the wound site. Yup, sugar! Keep some sugar packets in your first aid kit. Why sugar? It's a natural antibacterial! Honey is another great option for applying a thin layer of protection to the wound. Just watch your pet as honey is tempting and they may try to lick the wound or bandage.
NOTE: This is only done to superficial wounds OUTSIDE the body cavity, such as shallow wounds on the legs or top of the neck — never for internal or deep wounds.
Then place a layer of the sterile lube you used earlier to protect the wound from the fur. Next, place a few gauze pads over the area and gently wrap the area with vet wrap. DO NOT pull and stretch the vet wrap because it will become too tight and cause more injury. Basically, you are just laying it around to secure the gauze pads. Secure the ends of the vet wrap to the site with first-aid tape, such as Elastikon — again, do not pull it tightly.
For deeper wounds (that penetrate the body cavity)
Find a towel, shirt, blanket, etc., cover the wound, and immediately transport your pet to the veterinarian. You do not want to risk any further debris or foreign materials getting into the wound by attempting to clean and prep the wound site.
Off to the veterinarian!
Your veterinarian will determine the best way to manage your pet’s wound. The type, location, and severity of the wound will determine how the wound will be managed. Some wounds will simply need proper flushing, topical ointments, and medical treatment (antibiotics and pain meds), whereas others will require surgery or surgery and longer-term wound treatment with bandages in addition to medications.
The most critical thing to do, after the treatment plan is determined and implemented, is to listen carefully to your veterinarian’s instructions and follow them exactly. Often, we are so stressed and relieved that the initial issue is passed that we can forget what was said and we misplace the discharge instructions. For at-home wound care tips, especially after surgery, read more about care for dogs and cats here.

How Do You Know Your Pet's Wound Is Healing?
- For a routine incision, you know that the incision is improving and healing because the swelling and bruising will gradually and continually disappear. There will also be re-growth of the fur starting in the area.
- To know the abscess is healing, the site will remain ‘flattened’ and the drainage will stop within 2 to 5 days. Your dog will also be eating, drinking, and acting normally.
- Partially or completely open wounds – while they take the longest to heal (4 to 8 weeks) – will have some obvious changes to indicate they are healing:
- The formation of granulation tissue – small rounded masses of tissue appear (looks kind of bumpy)
- There will be minor bleeding or oozing of blood
- There will be wound contracture – meaning the wound will continually look smaller and smaller. You will see smooth, thin, and pink tissue forming around the edges.
- The depth of the wound gets shallower with time. It will appear to be leveling out.
It cannot be stressed enough about how important it is to follow all of your veterinarian’s instructions, give all medications as instructed as well as finish them, to keep your pet’s activity restricted with a cone on.
Patience and diligence are important during the whole process.
And lastly, call a veterinarian immediately if anything does not seem normal. Better safe than sorry — any delay can be dangerous for your pet and costly for you!