 Putting your dog or cat's face onto a pumpkin is a super fun and easy way to get the whole family involved in the Halloween festivities.
First, we'll go over how to make your pet's pumpkin stencil from one of their photos. Then we'll get our hands dirty and start the carving.
These instructions should work for any design you'd like to put on your pumpkin and the activity is for all ages and artistic levels.
Thanks to Bob Ross, I know that there are no mistakes, only happy accidents, so even if the finished product doesn't look exactly as you expected, it's Halloween — everything is supposed to be a little "off"!
Don't want to fuss with making a detailed stencil? Download these free dog and cat silhouette stencils:
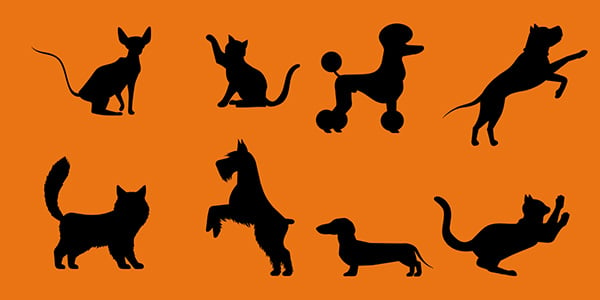
- Cat Pumpkin Carving Silhouette Stencils (8 Designs)
- Dog Pumpkin Carving Silhouette Stencils (14 Designs)
Stencils made using design vectors created by macrovector_official
What You'll Need to Make a Pumpkin Stencil from a Photo
- Photo of your pet(s)
- Best results will be from images with high contrast of lights and darks.
- A printer that works (this tends to be the hardest thing to find in our house)
- Microsoft word or a photo editing program like Photoshop (for paid users) or Gimp which is free
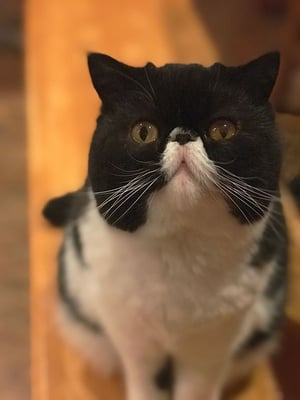 I decided to use this photo of my kitty, Mazel. Even though he is naturally high-contrast, his features like his nose and mouth are so tiny it's hard to get good definition but very easy to carve out too much too close together.
I really want the main attraction of the pumpkin to be Mazel's face, and since my pumpkin's main focal surface area is about 6" x 6", I cropped the photo to 6" x 4".
To manipulate the image, first convert your color photo to grayscale.
You can adjust your image in Microsoft Word by inserting your image in a document, then clicking Picture Format, which will bring up different options for adjusting the color of your image.
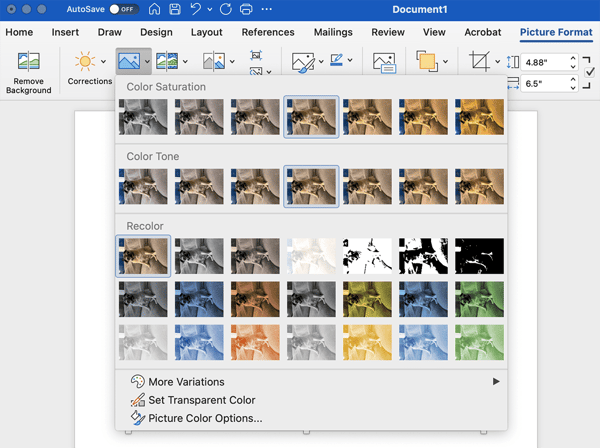
If you are using Photoshop: Image > Mode > Grayscale
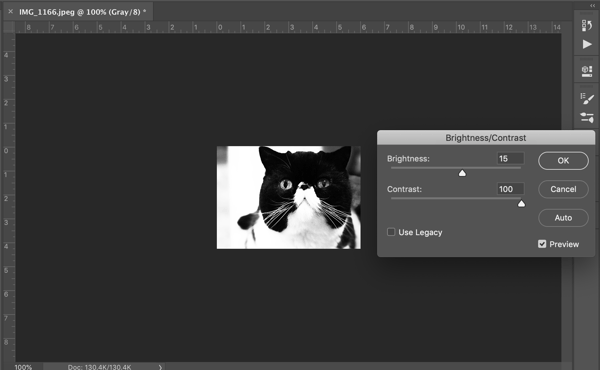
Now it's time to boost the contrast. Unfortunately there are less options to play around with in MS Word but if you're using Photoshop go to Image > Adjustments > Brightness/Contrast.
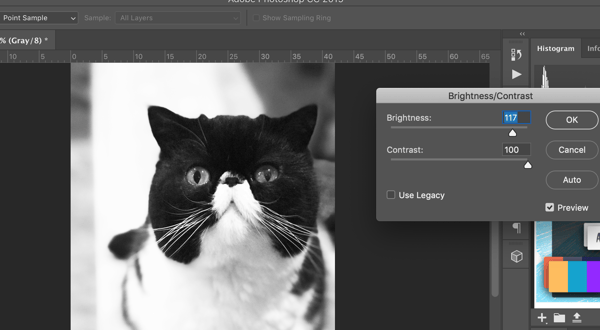
You may need to do repeat this step multiple times — whatever makes it easiest for you to be able to distinguish light from dark.
If you're using Photoshop, you can also use the Dodge tool to lighten areas throughout the image. I used it around Mazel's eyes and his cute little nose.
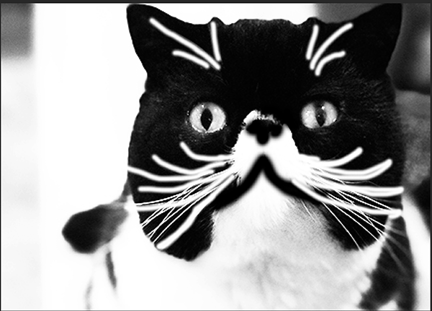
If you couldn't have guessed already, whiskers are really tricky. Either avoid them altogether or use a drawing tool to exaggerate them. For Mazel, I drew thicker whiskers and made his nose and mouth a little more full to complete the template.
Now it's time to print your stencil and get it on your pumpkin.
Prepping Your Pumpkin for Carving
You probably can use any pumpkin, but I like to go easy on myself by using a gourd with a relatively smooth and large surface area and as few blemishes or ridges as possible — at least where I'll be carving.
Note: You can also use reusable foam pumpkins from your local craft store to keep your designs around year after year!
-
Wipe down your pumpkin with an anti-bacterial wipe to keep away any bacteria that could cause early rotting
-
Cut a "back door" in the back of the pumpkin instead of taking the stem off the top
-
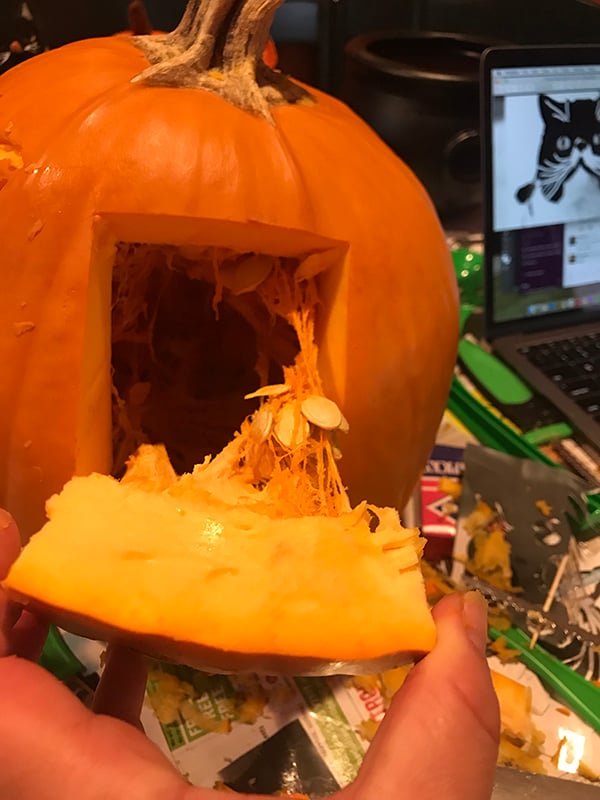
Pumpkin carving experts say that instead of cutting from the top where the stem gives nutrition to the pumpkin after it has been picked, you should cut and clean from the back of the pumpkin. This not only keeps the pumpkin alive for longer, but it also makes for easier access to your light source.
-
This was my first time cutting a back door and I found it to be a little more difficult to clean inside, but next time I'll try creating a bigger entryway since it will be patched up either way. It was really easy to put the tea light candles in and would be even better for anyone using a corded light source.
Get Your Pumpkin Carving Tools Ready
-
Your handy dandy stencil cut out
-
A serrated knife, pumpkin carving kit knives and scooper if you have one, otherwise an Exacto knife
-
Tape to hold your stencil
-
Push pins, safety pin, toothpicks, or the plastic punch tool from your pumpkin carving kit (the toothpicks also come in handy if you accidentally cut off something that was supposed to stay on...I might know from experience)
- Newspaper to put underneath your work area so you can get as messy as you need
Here's the set of pumpkin carving tools I ended up using
Put the stencil on your pumpkin using your tape and have it lay as flat as possible. We're keeping things simple around here but your image may have more gray than mine, and if you're a pro or feel like challenging yourself, go ahead and try some shading!
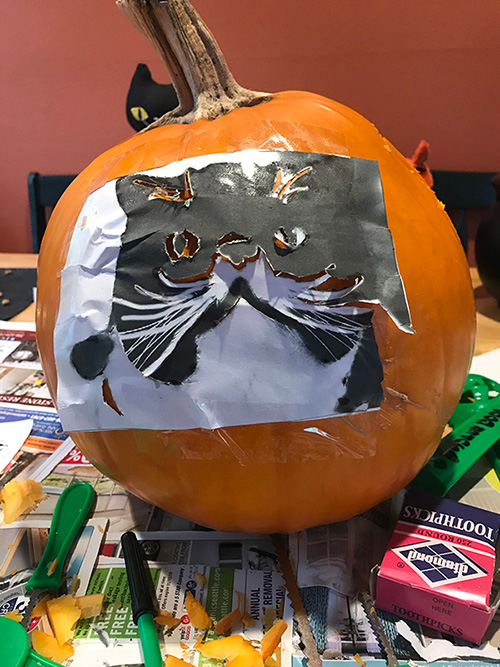
Use your push pin, safety pin, or toothpicks to punch out little holes to trace the black parts of your image. The closer the holes are, the easier it will be for you to follow the tracing to cut later on, but also remember you don't need to cut out everything you have traced.
The best tip I can give you is to take a step back every once in a while to make sure everything that needs it has a continued connection to the pumpkin so that it's not suddenly floating in space and then taking its sad spot on the compost pile.
Once you've got your outlines traced, you can remove the stencil and start cutting!
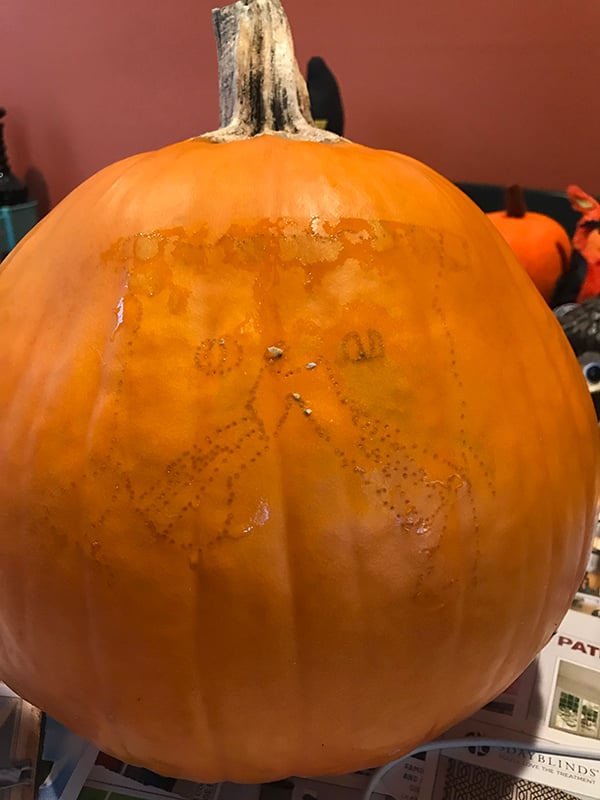
Keep a picture of your stencil handy so you remember what to cut and what to keep. I had to cut a bit of an extra outline around Mazel's head so that it would show up on the pumpkin. Also remember to go slowly - you can always cut out more but it is very difficult to put pumpkin back in.
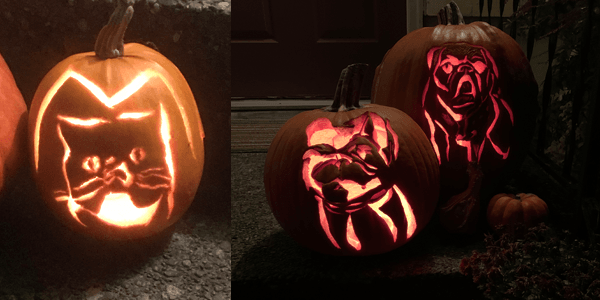
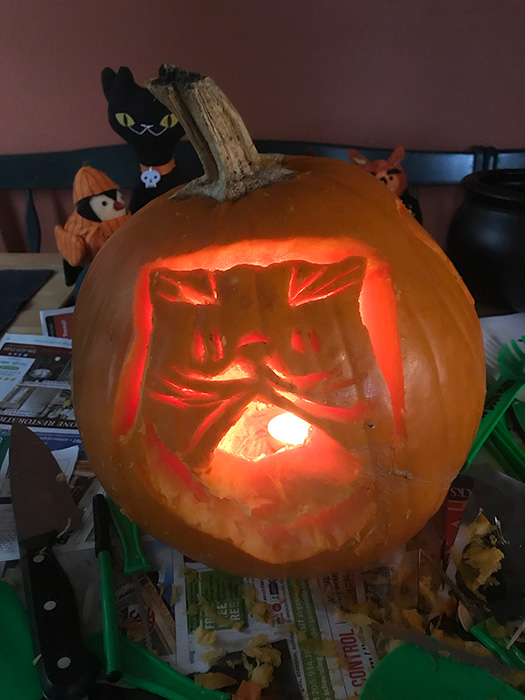
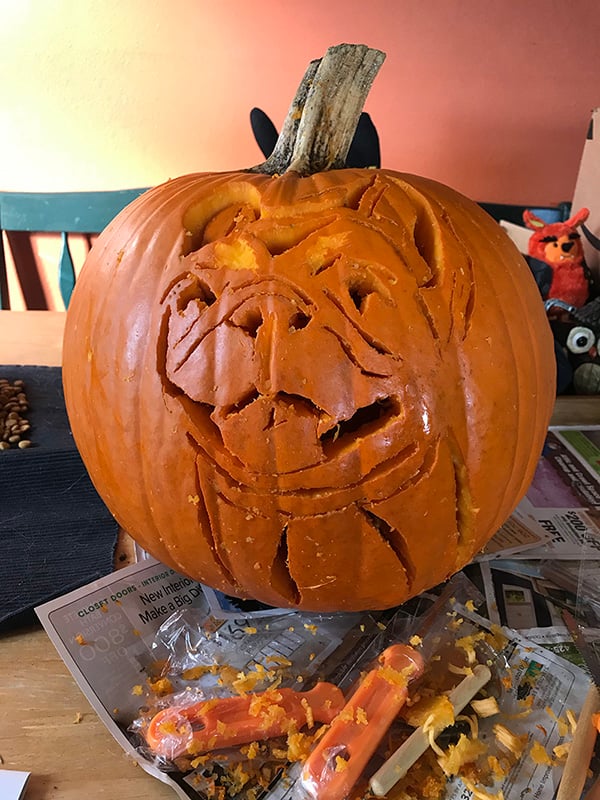
Here's what the carved finished product looks like before lighting (and this was very scary for me because I totally thought I ruined it)

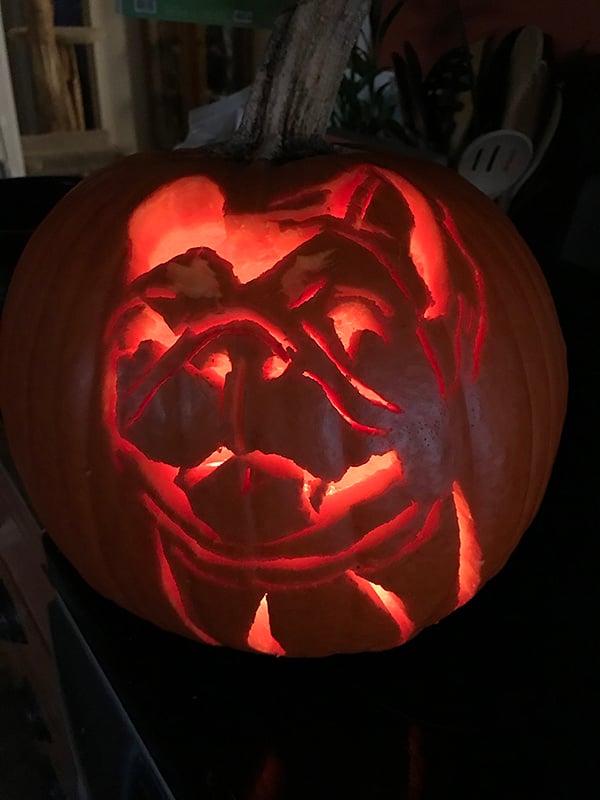
But once it was lit, I thought it looked pretty cute!
UPDATE: Here is my French bulldog Marshall pumpkin! What I learned this time, is that you can have more detail without taking out too much of the pumpkin!
I think the important thing is making distinctive lines as thick as you need them to be to let light shine through, but not take out too much or disconnect things so as to take out a chunk of the pumpkin (which I did to Mazel's, and still ended up doing to Marshall's).
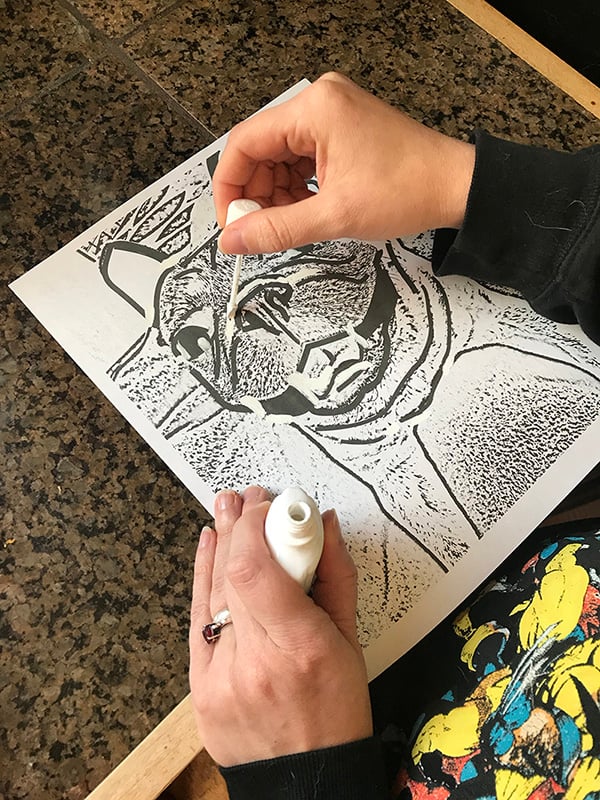
My wife helped me with visualizing things though, and created a stencil for me out of Marshall's picture. She also added some white out to make it so that I wouldn't carve too much.
I still managed to carve a little too much, but I'm really happy with the results!
Halloween Pumpkin Candle Safety
When it comes time to lighting up your (beautifully) carved creations, it’s best if you opt for an alternative to traditional or tea light candles.
Not only will options like a powered flameless candle likely last longer than a regular candle, but you’ll also avoid the potential for your pet to burn themselves or the house while walking past or investigating your pumpkins. Carved pumpkins do smell good!!
Some fun ways to light a pumpkin without a candle
The following is a list of several alternative lighting ideas to candles, many of which you might already have around the home. If you choose a battery-powered option, just make sure that the battery doesn't get eaten — some batteries are worse than others.
1. LED Pumpkin light - There are several options on the market for battery-powered LED lights made specifically for carved pumpkins. Some act as strobe lights or change colors!
2. Battery-powered tea light or candle - These flameless candles give off a similar flicker and glow to a candle without the waxy mess or the threat of wind. Some of these candles also have auto switches, so you don't even need to manually turn them on or off.
3. Glowstick - This inexpensive, easy way to add color and light to your pumpkin will last for hours and removes the fire hazard. Just be careful with this option for pets that like to chew on foreign objects because the contents can be very hazardous.
4. Flashlight - You may conveniently have a small flashlight lying around the house which you can tuck inside your carving. With fresh batteries, this bright light will last all through the night.
5. Christmas lights - For pets that are seasoned experts at leaving cords and wires alone, you can bust out your holiday lights a few months early. If your pumpkin can be placed near an outlet, bunch up your string lights and stuff them inside your carved creation.
6. Book light - Designed to last for hours, book lights can easily be manipulated to shine the desired direction you want.
Do you have any tips for doing things even more easily? Want to show us your finished masterpiece? Leave a note in the comments below, or send us an email with a picture of your pumpkin, we'd love to see it!